Tag: Casual Games

Lego Batman 3 The Squad Characters And Mission...
The Squad downloadable content pack for LEGO Batman 3: Beyond Gotham brings a dark yet humorous twist to the classic superhero gaming formula. Players are tasked with infiltrating Belle Reve Penitentiary to track down a mysterious intruder before sensitive security secrets are leaked to the public. This expansion offers unique story objectives, distinct roster capabilities, and several hidden collectibles that complete the total completion experience.
Understanding The Squad Roster and Abilities
This expansion introduces fan-favorite anti-heroes including Deadshot, Deathstroke, Harley Quinn, and Captain Boomerang alongside Amanda Waller. Each character brings specific combat skills and interaction tools needed to solve intricate security puzzles within the prison complex. Utilizing their unique ranged attacks and explosive devices is essential for clearing obstacles efficiently.
Switching between team members during tactical encounters allows players to navigate guarded hallways and specialized tech panels. Mastering these distinct abilities makes both the initial story playthrough and subsequent free play runs far more manageable.
Navigating the Belle Reve Mission Objectives
The core campaign level requires players to push deeper into the high-security facility while countering security lockdowns and hostile guards. Objective markers guide the squad through various containment blocks, security hubs, and central control rooms. Careful coordination of character skills is mandatory to unlock main doors and maintain momentum throughout the level.
Environmental puzzles frequently require blowing up silver Lego structures or interacting with specialized consoles to clear the forward path. Staying alert during high-pressure combat sequences ensures that your squad completes the infiltration without unnecessary restarts.
Finding Collectibles and Achieving 100 Percent Completion
To fully complete the mission, players must track down all ten hidden Minikit canisters scattered across hidden alcoves and high ledges. Additionally, players must locate and rescue Adam West in Peril to earn an extra Gold Brick for their overall collection. Achieving the True Hero status by collecting enough studs during the level guarantees total completion rewards.
Revisiting the level in Free Play mode is necessary to access secret areas requiring powers outside the default squad setup. Bringing characters with flight, laser, or magnetic powers unlocks every remaining secret trapped behind specialized walls.
Maximizing Strategy for Free Play Mode
Planning your roster before starting Free Play saves significant time when re-entering Belle Reve Penitentiary. Selecting a balanced roster with tech access, silver destruction, and flight ensures you hit every target in a single run. This systematic approach turns a complex level into a smooth and rewarding completion process.

Jedi Survivor Blustery Mesa Treasure Location And How...
Exploring the windy cliffs of Jedha in Star Wars Jedi Survivor presents players with unique platforming challenges and hidden collectibles. Among the various regions on the desert planet, Blustery Mesa contains several valuable treasures that require precise movement and smart tactics to collect. Navigating this area demands a firm grasp of Cal Kestis' traversal abilities as well as clever strategies for dealing with environmental hazards.
Reaching the Blustery Mesa Region on Jedha
To begin your search for the treasures hidden within Blustery Mesa, you must navigate through the Pilgrim's Path area on Jedha. Players can easily access this zone by traveling from nearby meditation points, such as the Crypt of Uhrma. Knowing the layout of these interconnected tunnels and windy ledges helps prevent unnecessary backtracking during your exploration.
As you traverse the region, keep an eye out for wind currents and wall-running surfaces that lead across deep gaps. These movement paths often conceal hidden ledges where valuable items like Jedha Scrolls reside. Reaching certain elevated platforms will require combining dashes, double jumps, and mid-air directional adjustments.
Locating the Jedha Scrolls and Hidden Collectibles
Blustery Mesa hosts multiple treasure pickups, primarily in the form of Jedha Scrolls that can be traded for cosmetic rewards and upgrades. One scroll sits on an upper ledge located near the elevator shortcut that connects back toward the Crypt of Uhrma. Careful platforming along the cliff face allows players to drop down safely onto the ledge and claim the item.
Another treasure requires exploring the winding caves filled with hostile Imperial forces and local fauna. After clearing out the enemies occupying these chambers, search the corners and raised alcoves to ensure no hidden items are left behind. Taking your time to inspect every side path is essential for reaching full map completion.
Outsmarting the Elusive Blustery Mesa Scavenger Droid
The most notorious treasure in Blustery Mesa is carried by an elusive Scavenger Droid tucked inside a narrow wind tunnel. Because strong wind gusts blow directly toward Cal, sprinting or jumping straight at the droid often causes it to burrow underground before you can land a strike. This fast-moving target has stumped many players trying to complete their Jedha treasure collection.
To successfully defeat the droid, players can utilize clever ranged combat tactics rather than a direct physical chase. A popular and reliable solution involves defeating the nearby Stormtroopers, grabbing a dropped shield with Force Pull, and hurling it down the wind tunnel directly at the droid. Alternatively, throwing your lightsaber or using specialized BD-1 abilities from a distance will destroy the droid before it burrows away, allowing you to cross the windy gap and pick up your scroll.
Tips for Efficient Exploration and Completion
Before attempting to clear every collectible in Blustery Mesa, ensure you have unlocked essential late-game mobility upgrades. Story progression grants abilities like Merrin's Charm, which allows Cal to pass through green laser barriers scattered throughout the environment. Attempting to complete the map too early may result in hitting impassable obstacles.
If a Scavenger Droid manages to escape during your attempt, simply rest at the nearest Meditation Point to reset the area. Returning to the wind tunnel with a fresh approach allows you to execute your ranged attack smoothly. With patience and the right strategy, securing every treasure in Blustery Mesa becomes a rewarding milestone on your journey.

Assetto Corsa Wheel Not Working in Game Troubleshooting...
Experiencing hardware unresponsiveness while attempting to hit the virtual track in Assetto Corsa can be a frustrating hurdle for sim racing enthusiasts. When a steering wheel fails to register inputs or respond to force feedback, the issue usually stems from driver conflicts, improper control assignment, or third-party software interference. Methodically isolating these potential failure points allows players to restore proper wheel communication and return to competitive racing.
Verifying Hardware Connectivity and Driver Status
Before modifying software settings, players must confirm that the racing wheel is physically connected and properly recognized by the operating system. Plugging the device directly into a motherboard USB port rather than an unpowered hub often resolves detection issues. Verifying that the latest manufacturer drivers and control panel software are installed ensures basic functionality.
Opening the official software application for your specific hardware allows you to test inputs and force feedback effects outside of the simulator environment. If the wheel does not respond within its native suite, cycling the power source or reinstalling the device drivers will typically resolve the underlying hardware conflict. Once operating system recognition is established, troubleshooting can shift directly toward the game environment.
Configuring In-Game Controls and Binding Inputs
Assetto Corsa requires precise input binding within its options menu before hardware will respond properly on track. Navigating to the controls settings enables players to select their specific input type and manually map steering, pedal, and shifter axes. Failing to save custom input presets often results in the game defaulting to an unassigned controller layout.
Testing inputs through the visual calibration bars in the settings menu provides real-time verification of axis detection. Ensuring that all pedals operate on separate axes rather than combined modes prevents unpredictable throttle and brake behavior. Assigning key functions clearly ensures that the simulator correctly interprets every physical rotation and pedal press during session launches.
Resolving Content Manager and Steam Input Conflicts
Many sim racers utilize community tools like Content Manager alongside custom modifications to launch their racing sessions. If the game detects a steering wheel in standard menus but fails to register inputs on track, Steam's built-in controller configuration may be overriding the device. Disabling Steam Input for Assetto Corsa allows the application to read the hardware directly without secondary emulation layer issues.
Checking launch settings within third-party launchers helps identify conflicting controller profiles or missing execution permissions. Running both the launcher and game executable as administrator frequently resolves hidden permission barriers that block input detection. Ensuring that all custom plugins correspond to your current hardware driver version maintains overall system stability.
Calibrating Force Feedback and Signal Transmission
Once input detection is functioning, fine-tuning force feedback parameters ensures natural steering resistance and telemetry feel. Incorrect force feedback gain or inverted signal settings can make the wheel feel completely unresponsive or overly loose during cornering maneuvers. Adjusting main force levels while leaving secondary damping effects low prevents motor clipping and hardware overheating.
Inverting the force feedback direction within the options menu is often required for specific wheel bases to prevent the rim from spinning violently away from center. Regularly checking for firmware updates provided by hardware manufacturers helps prevent unexpected signal dropouts during long stints. Systematic configuration adjustments guarantee a reliable and immersive driving experience across all vehicle classes.

Assetto Corsa Wheel Not Working in Game Troubleshooting...
Experiencing hardware unresponsiveness while attempting to hit the virtual track in Assetto Corsa can be a frustrating hurdle for sim racing enthusiasts. When a steering wheel fails to register inputs or respond to force feedback, the issue usually stems from driver conflicts, improper control assignment, or third-party software interference. Methodically isolating these potential failure points allows players to restore proper wheel communication and return to competitive racing.
Verifying Hardware Connectivity and Driver Status
Before modifying software settings, players must confirm that the racing wheel is physically connected and properly recognized by the operating system. Plugging the device directly into a motherboard USB port rather than an unpowered hub often resolves detection issues. Verifying that the latest manufacturer drivers and control panel software are installed ensures basic functionality.
Opening the official software application for your specific hardware allows you to test inputs and force feedback effects outside of the simulator environment. If the wheel does not respond within its native suite, cycling the power source or reinstalling the device drivers will typically resolve the underlying hardware conflict. Once operating system recognition is established, troubleshooting can shift directly toward the game environment.
Configuring In-Game Controls and Binding Inputs
Assetto Corsa requires precise input binding within its options menu before hardware will respond properly on track. Navigating to the controls settings enables players to select their specific input type and manually map steering, pedal, and shifter axes. Failing to save custom input presets often results in the game defaulting to an unassigned controller layout.
Testing inputs through the visual calibration bars in the settings menu provides real-time verification of axis detection. Ensuring that all pedals operate on separate axes rather than combined modes prevents unpredictable throttle and brake behavior. Assigning key functions clearly ensures that the simulator correctly interprets every physical rotation and pedal press during session launches.
Resolving Content Manager and Steam Input Conflicts
Many sim racers utilize community tools like Content Manager alongside custom modifications to launch their racing sessions. If the game detects a steering wheel in standard menus but fails to register inputs on track, Steam's built-in controller configuration may be overriding the device. Disabling Steam Input for Assetto Corsa allows the application to read the hardware directly without secondary emulation layer issues.
Checking launch settings within third-party launchers helps identify conflicting controller profiles or missing execution permissions. Running both the launcher and game executable as administrator frequently resolves hidden permission barriers that block input detection. Ensuring that all custom plugins correspond to your current hardware driver version maintains overall system stability.
Calibrating Force Feedback and Signal Transmission
Once input detection is functioning, fine-tuning force feedback parameters ensures natural steering resistance and telemetry feel. Incorrect force feedback gain or inverted signal settings can make the wheel feel completely unresponsive or overly loose during cornering maneuvers. Adjusting main force levels while leaving secondary damping effects low prevents motor clipping and hardware overheating.
Inverting the force feedback direction within the options menu is often required for specific wheel bases to prevent the rim from spinning violently away from center. Regularly checking for firmware updates provided by hardware manufacturers helps prevent unexpected signal dropouts during long stints. Systematic configuration adjustments guarantee a reliable and immersive driving experience across all vehicle classes.
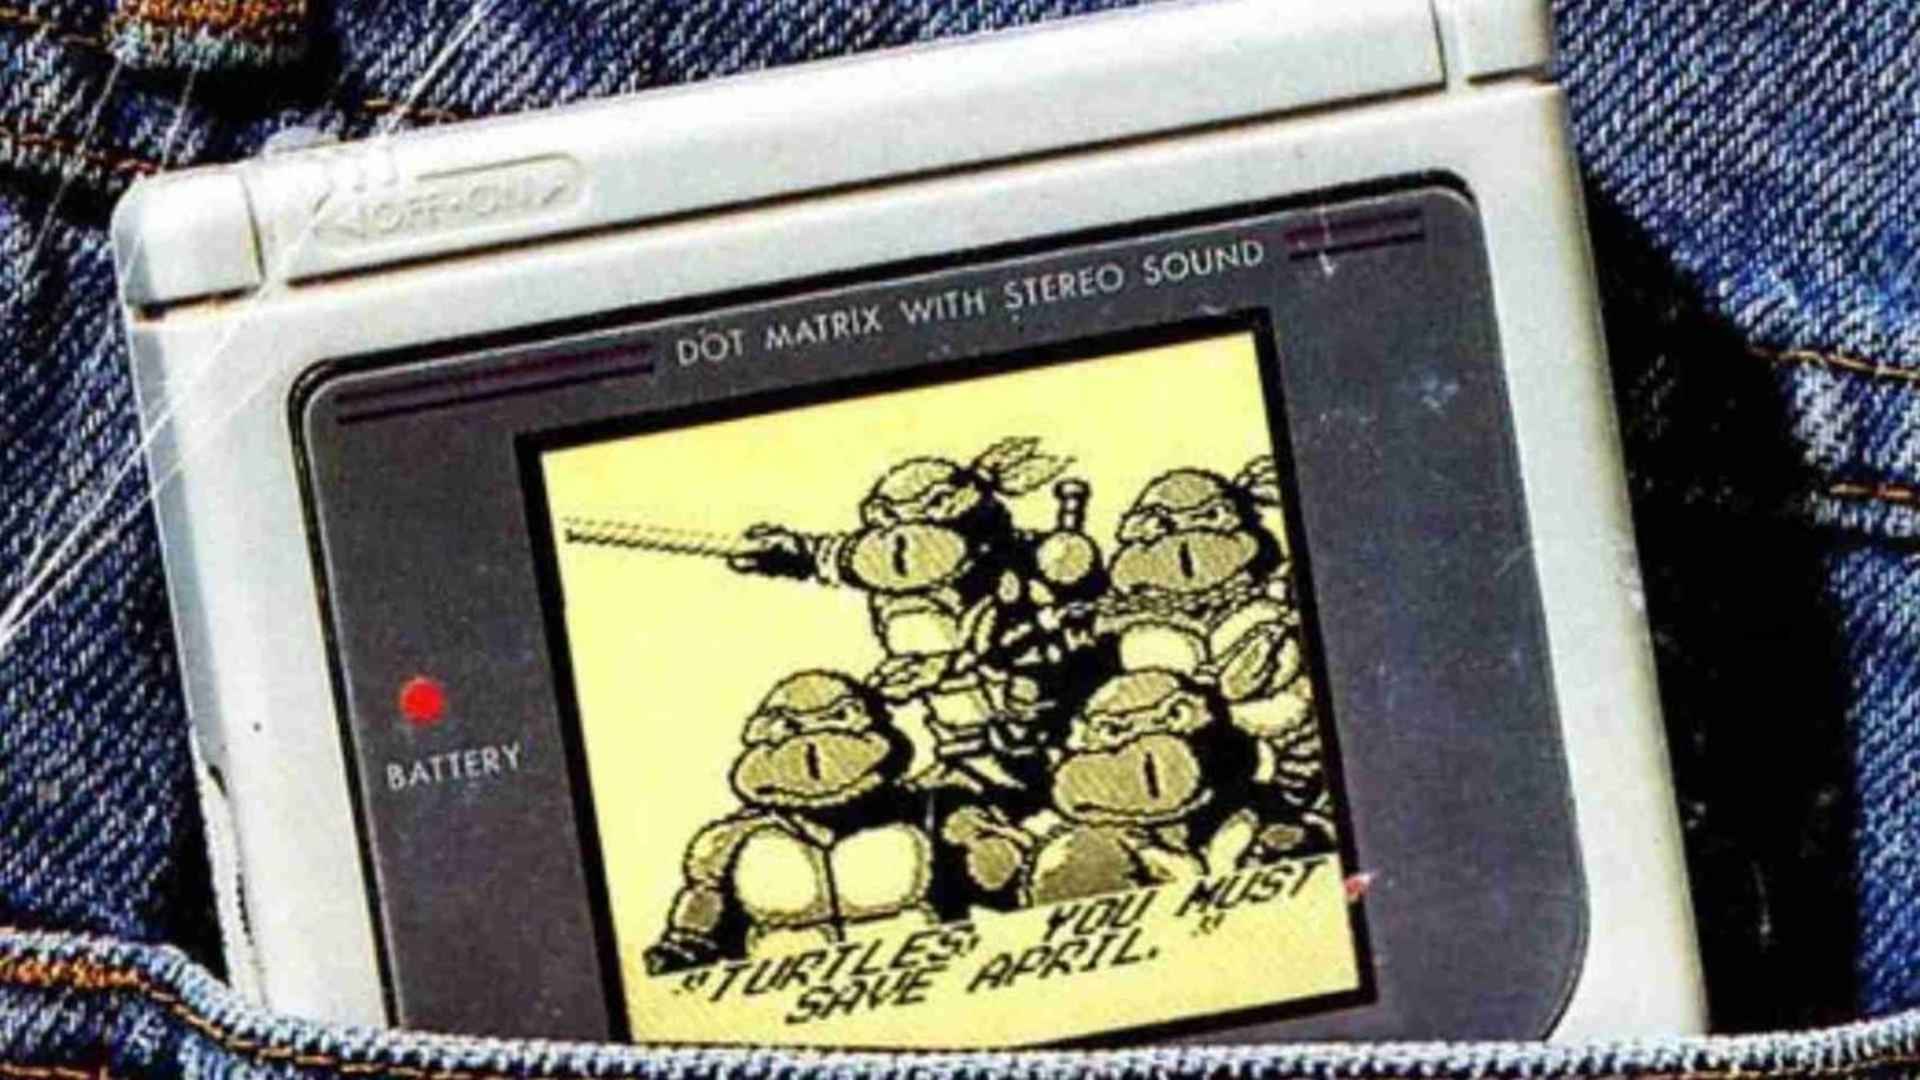
My Friendly Neighborhood Dog Food: How to Find...
Navigating the quirky yet tense corridors in My Friendly Neighborhood requires players to solve environmental puzzles while managing unpredictable puppet threats. Among the various side objectives and achievements scattered throughout the game, helping the local dogs stands out as a unique challenge. Locating the special Dog Food item and placing it in the correct location allows players to soothe these creatures and unlock exclusive progress toward a complete playthrough.
Locating the Dog Food in the Aviary Grounds
Finding the Dog Food requires players to venture into the outdoor garden and Aviary area of the studio complex. Accessing this zone usually involves solving precursor puzzles to open secured doors and gain entry into the rear courtyard. Players should carefully inspect the room behind the Aviary structures, where the food item rests on a nearby surface waiting to be collected.
Unlocking Access to the Aviary Area
Reaching the location where the Dog Food is stored depends on clearing specific structural barriers beforehand. Players must collect key items, such as the two halves of the metal disk, to open the primary entrance leading toward the Aviary. Additionally, restoring power by interacting with the breaker switches inside the facility ensures all shutter doors operate properly.
How to Use the Dog Food to Pacify the Dogs
Once the Dog Food is in your inventory, head over to the designated feeding station situated near the greenhouse section. Place the collected food into the three food bowls and ring the adjacent bell to trigger the event. This action completes the objective, causing the dogs to disperse peacefully and granting the associated game achievement.
Why Completing the Dog Quest Matters
Pacifying the dogs eliminates a persistent hazard from the outdoor garden routes, making future traversal significantly safer. Resolving this task is also necessary for players striving to unlock the best possible story conclusion by assisting all friendly puppets. Taking the time to locate the Dog Food ultimately transforms a chaotic encounter into a smooth and rewarding survival strategy.

Where Do You Find Citrine in Dreamlight Valley
Mining for precious gemstones is a fundamental activity in Disney Dreamlight Valley that helps players progress through quests, construct unique items, and earn extra Star Coins. Citrine is a vibrant orange gem that is frequently required for village quests and crafting projects. Knowing the exact locations and methods to gather this valuable resource will help you manage your daily tasks efficiently.
Primary Biomes for Mining Citrine
To locate Citrine, players must head to two specific regions in the game: the Glade of Trust and the Sunlit Plateau. Mining the dark rock nodes along the rock walls in these biomes yields standard Citrine as well as its rare, high-value variant, Shiny Citrine. Players should focus their efforts solely on these areas, as Citrine does not spawn in other parts of the valley.
The Glade of Trust is accessible earlier in the game, making it an ideal location for new players seeking orange gems. Meanwhile, unlocking the Sunlit Plateau provides additional mining nodes to increase your total yield during farming loops. Alternating between both regions allows you to mine continuously without waiting long for nodes to reset.
Understanding Node Respawn and Drop Rates
Rock nodes in Disney Dreamlight Valley require approximately five minutes to respawn after being mined completely. While nodes with visible orange crystals guarantee a gem drop, dark nodes without visible crystals still have a chance to yield Citrine. Clearing every node in the Glade of Trust and Sunlit Plateau ensures fresh nodes have a chance to generate gems upon respawning.
If you need extra gems for quests or crafting, bringing along a villager assigned to the mining role increases your total rewards. A level 10 mining companion provides a high chance of duplicating any gem you extract from a rock node. Utilizing pickaxe polish potions can also dramatically boost the number of drops you receive during a single mining run.
Uses for Citrine and Shiny Citrine
Citrine plays an essential role in completing several character friendship quests, including missions for Mother Gothel and Scar. In addition to quest progression, the gem serves as a key crafting material for decorative furniture and outdoor structures. Keeping a modest stockpile of gems in your home storage ensures you are always prepared for unexpected quest requirements.
When you are short on Star Coins, selling spare Citrine at Goofy's Stall yields 380 coins for standard gems and 1,500 coins for Shiny Citrine. While farming for profit, combining your mining routine with energy-restoring meals ensures you can clear nodes rapidly without unnecessary trips back to your house.

Princess Peach Super Mario Odyssey And Her Role...
Super Mario Odyssey brought a refreshing evolution to the long-standing narrative dynamic between Mario, Bowser, and Princess Peach. While the central conflict initially centers on rescuing Peach from forced matrimony, her involvement expands significantly throughout the journey across diverse kingdoms. Her presence drives both the overarching storyline and the post-game exploration experience for players.
A Central Catalyst in the World Tour
Bowser attempts to organize an extravagant wedding by stealing iconic items from various realms across the globe. Princess Peach remains at the heart of this conflict, accompanying Bowser aboard his airship as Mario pursues them across distant kingdoms. Her strategic subtle presence in cutscenes provides key narrative motivation for every destination Mario visits.
Throughout the main campaign, Peach shows remarkable resilience despite her captivity. She continually offers emotional support to her tiara companion, Tiara, who is also captured to serve as Bowser's wedding veil. This shared plight highlights Peach's compassionate nature even when facing difficult circumstances.
Redefining Her Independence
The climax of the story on the Moon provides one of the most memorable character moments in modern Nintendo history. After Mario defeats Bowser, both suitors desperately offer flowers to Peach in a chaotic attempt to win her favor. Peach flatly rejects both proposals, choosing independence over an unwanted dynamic.
This decisive action marks a major shift in how her character operates within the Mushroom Kingdom lore. Instead of returning immediately to her castle, she decides to embark on a solo journey across the world. Her decision highlights personal agency and a desire to explore the universe on her own terms.
The World-Traveling Post-Game Narrative
After completing the main story, players can encounter Princess Peach visiting every single kingdom in the game. Dressed in region-appropriate travel attire, she offers a friendly conversation and rewards Mario with Power Moons upon discovery. Exploring these lands allows players to see her enjoying the world as an active tourist rather than a monarch in distress.
Her post-game presence enriches the overall gameplay experience by providing continuous goals for completionists. Finding Peach in hidden corners of each kingdom adds depth to the post-game content while reinforcing her new spirit of adventure. Players gain valuable rewards while witnessing her independent lifestyle firsthand.
A Lasting Impact on the Franchise
Princess Peach's representation in Super Mario Odyssey set a new precedent for her role in future gaming installments. By balancing her traditional royal duties with autonomous exploration, Nintendo modernized her character for a contemporary audience. Her journey stands as a powerful demonstration of growth within a beloved, classic franchise.

Let's Go Eevee Fishing Rod Location And How...
Diving into the vibrant world of Kanto in Pokemon Let's Go Pikachu and Eevee brings a delightful mix of nostalgia and updated gameplay elements. Many trainers exploring the streams and coastal areas of the region naturally find themselves looking for a traditional fishing rod to hook rare aquatic companions. Understanding how the game handles these water-based encounters is essential for completing your Pokedex efficiently.
The Truth About the Fishing Rod in Let's Go Eevee
Trudging through traditional fishing spots might leave veteran players feeling a bit confused early in their journey. The reality is that there is actually no physical fishing rod item available to obtain in this specific pair of Kanto remakes. Game developers chose to streamline the capture process by completely removing old key items like the Old Rod, Good Rod, or Super Rod.
This major shift changes how players must approach finding wild water-type creatures across the map. Instead of casting a line from the shore, your interactions with bodies of water rely entirely on dynamic movement over the surface. It serves as a modern departure from original mechanics while keeping exploration active and engaging.
How to Access and Navigate Water-Type Pokemon
Since casting a line from the riverbank is no longer an option, trainers must unlock a specific replacement mechanic to explore the open waters. This is accomplished through a special out-of-battle feature known as a Secret Technique, which takes the place of traditional Hidden Machines. Specifically, you will need to learn the Sea Skim technique to safely travel across lakes and oceans.
To acquire this essential ability, you must progress through the main story until you successfully reach Fuchsia City. Head over to the GO Park Complex area and look for an NPC standing next to a Lapras near the outdoor pools. Speaking with this man will prompt him to teach your partner Eevee the Sea Skim technique for immediate use.
Catching Water Pokemon Safely Without a Rod
Once your companion learns to glide across the waves, encountering wild water-type creatures becomes a straightforward process. Simply approach any shoreline or edge of a lake and press the action button to begin surfing automatically. Wild Pokemon will spawn directly in the overworld water, allowing you to choose exactly which ones you wish to bump into.
This visual spawning method replaces the old random battle system entirely, giving you full control over your catching chains. You can build massive catch combos easily by targeting the same species as you navigate through the sea routes. For those looking to optimize their collection strategies, checking out a comprehensive guide can offer excellent insight into spawning behaviors.
Alternative Early Game Water Encounters
Trainers who are eager to add a water-type companion to their team before reaching Fuchsia City still have a few solid options available. Certain species like Psyduck, Squirtle, or Krabby can occasionally be encountered in standard tall grass patches along early routes. Keeping a close eye on these fields ensures your party stays well-balanced before you ever set foot on the water.
Additionally, an early-game Pokemon Center salesman near Mt. Moon offers a Magikarp for a very small fee. Investing in this fish early allows you to evolve it into a powerful Gyarados through standard battle experience. Utilizing these clever map alternatives ensures you never feel limited by the lack of a traditional fishing tool.

Does Remnant 2 Have Crossplay And How Multiplayer...
Exploring the shifting, unpredictable worlds of the Root requires intense coordination and powerful teamwork to survive the toughest challenges. As a popular cooperative survival shooter, players frequently wonder how easily they can team up with companions operating on different gaming platforms. Understanding the mechanics behind matchmaking and system compatibility can drastically improve your next multiplayer session.
Full Crossplay Availability Across Platforms
Gunfire Games actively listened to community feedback and implemented a comprehensive crossplay system for their popular action title. This helpful feature allows players on PlayStation 5, Xbox Series X/S, and PC to seamlessly join the same lobby and tackle dangerous bosses together. By removing traditional platform barriers, the game ensures an incredibly active matchmaking pool for players worldwide.
To utilize this ecosystem, you simply need to link your active platform account to an Epic Games account within the system settings. This universal framework handles the backend connection required to bridge different networks smoothly. Once established, you can find your friends easily regardless of whether they prefer console or desktop environments.
How Multiplayer Compatibility Works in Lobbies
The multiplayer architecture relies heavily on host-based sessions where game progress is directly tied to the hosting player's campaign world. When you join an ally's game, you retain your character progression, acquired weapons, scrap, and valuable trait points. However, quest choices and specific world state advancements will remain unique to the host's timeline.
This smart design choices encourages teams to take turns hosting sessions to ensure everyone experiences alternative narrative paths. It is also important to verify that all party members have the same game version installed before attempting to connect. Because updates must deploy simultaneously across different digital storefronts, minor version disparities can temporarily disrupt lobby visibility.
Managing Game Settings for Smooth Connections
If you prefer a structured experience, navigating the system menus allows you to toggled cross-network features on or off at your convenience. Some console users prefer keeping matchmaking limited to their specific ecosystem to maintain uniform performance and loading speeds. Adjusting your lobby privacy settings between public, friends only, or offline ensures absolute control over your cooperative experience.
For those looking for a different challenge or comparing features, checking our can provide excellent context on how modern developers manage multi-platform connectivity. Ensuring your network settings are optimized can prevent unexpected disconnections during high-stakes boss encounters. Keeping these parameters in mind guarantees a flawless journey through the dangerous biomes of the game.

FF6 World of Ruin Map Complete Location and...
The transition into the cataclysmic second half of Final Fantasy 6 completely reshapes both the narrative stakes and the physical topography of the game world. Kefka's rise to godhood shatters the continents, leaving players with a non-linear sandbox where exploration becomes entirely optional but highly rewarding. Navigating the revamped FF6 World of Ruin map requires a calculated approach to locate your scattered party members and secure ultimate gear.
Navigating the Fractured Continents
The newly formed geography features isolated landmasses separated by jagged mountain ranges and toxic oceans, rendering traditional foot travel highly restricted. Players begin this dark chapter controlling Celes on a small solitary island, which establishes the desolate tone of this post-apocalyptic environment. Efficient movement across these treacherous territories becomes much simpler once you secure a mobile base of operations.
Reaching the town of Albrook allows you to chart the initial paths toward gathering your core companions and tracking rumors. From here, the broken landscape forces a careful progression as you slowly unearth hidden passages beneath the scorched earth. Learning the landmarks of this altered globe is essential for planning your tactical retrieval missions.
Locating the Scattered Returners
Rebuilding your active roster requires visiting seemingly abandoned settlements and investigating unusual environmental anomalies across the globe. For instance, exploring the decaying streets of Nikeah and the Serpent Trench reveals clues about Sabin's survival inside a burning house in Tzen. Every recruited ally drastically increases your tactical options and overall party flexibility ahead of the final dungeon.
Some companions are tucked away in deeply hidden locations that require specific triggers or mini-quests to fully expose. Tracking down the elusive master thief Locke leads you deep into the Phoenix Cave, which demands managing two separate teams simultaneously. Piecing your favorite combinations back together remains one of the most rewarding aspects of this open-ended structure.
Securing Secret Airships and Relics
True freedom of exploration unlocks only after you infiltrate the tomb of Daryl to salvage the hidden airship known as the Falcon. This legendary vessel allows you to bypass geographic barriers entirely, opening up immediate access to peripheral islands and end-game challenges. With the skies conquered, players can safely hunt down legendary monsters and hidden magical artifacts.
Many high-tier relics and magical items are guarded by ancient dragons scattered across isolated corners of the map. Defeating these optional elemental beasts rewards your active squads with unparalleled offensive capabilities and ultimate armor sets. Taking the time to scour every remote forest or mountain peak ensures your teams are fully prepared for the final ascent.
Confronting the Final Threat
At the center of this scarred world rests Kefka's Tower, a monumental labyrinth constructed from the ruins of the old civilization. This massive structure serves as the ultimate test of your army, forcing you to divide your characters into three distinct raiding parties. Thorough exploration of the outer map directly impacts your survival chances within these chaotic corridors.
Unlocking the full potential of your spellcasters and physical attackers transforms the intimidating final gauntlet into a manageable victory. By mastering the hidden secrets of the ruined world, you can confidently bring an end to the tyrannical reign of the clown god. Proper preparation remains the true key to restoring hope to a fractured universe.

where to find the bomb king ff16 Bomb...
In Final Fantasy 16, taking down notorious marks on the Hunt Board is one of the best ways to earn rare materials, experience, and gil. Among these elite targets, the Bomb King stands out as a critical adversary that players must defeat to progress through valuable side content. This guide covers everything you need to know to pinpoint this explosive creature's location and survive the fiery encounter.
Unlocking the Bomb King Hunt
Before you can set out to find this explosive monster, you must fulfill specific campaign requirements to make it spawn. The hunt itself becomes available during the main quest line after completing certain pivotal story milestones in the late-game stages. Specifically, you need to initiate the Weird Science side quest given by Owain at the Hideaway workshop.
Accepting this quest officially places the rank B notorious mark on your Hunt Board, allowing you to track it down in the open world. Trying to visit the spawn point prior to active quest registration will result in an empty arena, so talking to the engineer beforehand is mandatory. Preparing your gear and stocking up on recovery items at the Hideaway vendor will ensure you are ready for the battle ahead.
The Exact Spawn Location in Sanbreque
The Bomb King makes its home within the Holy Empire of Sanbreque, tucked away in a secluded woodland region. To reach this area quickly, you should fast travel to the Dragon's Aery obelisk, which serves as the closest spawn waypoint. From the obelisk, head directly south toward the area known as the Imperial Chase.
As you navigate through the narrow pathways of the Imperial Chase, look for a hidden opening leading into a circular clearing called The Crock. This secluded arena is surrounded by dense foliage and ancient ruins, serving as the perfect lair for the giant monster. Upon stepping into this location, a cutscene will trigger to announce the beginning of the intense boss fight.
Combat Strategy and Key Mechanics
Defeating this elite creature requires a solid understanding of its dangerous projectile attacks and self-destruct capabilities. The boss relies heavily on casting fire magic that sends large explosive spheres tracking across the battlefield toward Clive. Maintaining high mobility and using precise dodges will create counter-attack opportunities to rapidly deplete its stagger meter.
The most critical mechanic to watch out for occurs when the creature summons smaller bomb minions to overwhelm your positioning. If these smaller units are left alone for too long, they will cast a massive self-destruct spell that inflicts heavy area-of-effect damage. Using wide-reaching Eikonic abilities like Ramuh's Lightning or Garuda's Cyclone can eliminate these lesser threats before they explode.
Rewards and Crafting Utility
Emerging victorious from this fiery engagement rewards players with essential resources needed for late-game gear progression. In addition to standard experience points, ability points, and a hefty sum of gil, you will receive the highly sought-after Bomb Ash material. Bringing this unique component back to the Hideaway blacksmith allows you to forge advanced equipment upgrades.
Completing the associated side quest also unlocks an expanded item inventory capacity, providing a permanent benefit for the remainder of your journey through Valisthea. Taking the time to hunt down this elusive beast ensures your character remains properly equipped for the final challenges of the campaign.

How Many Blocks Is a Minecraft Chunk and...
Minecraft relies on an incredibly sophisticated engine designed to split its massive, procedurally generated worlds into manageable segments. These individual segments are known as chunks, and they dictate how the game loads, renders, and processes your virtual environment. Understanding how these pieces function can completely change the way you build, mine, and optimize your gaming performance.
The Mathematical Core of a Chunk
In Minecraft, a single chunk spans a horizontal area of 16 blocks wide by 16 blocks long. Vertically, chunks extend through the entire build limit of the world, stretching from the deepest bedrock up to the highest sky limit. Because modern updates have expanded world depth and height, a single chunk can contain hundreds of thousands of individual blocks from top to bottom.
When calculating a single horizontal slice of a chunk, you are looking at exactly 256 blocks per layer. When the game engine processes the environment, it uses this modular grid system to seamlessly load landscape features and structures. This layout ensures that your computer or console does not collapse under the weight of processing an infinite world all at once.
Why Chunks Matter for Performance
The primary reason chunks exist is to preserve system memory and optimize hardware performance during gameplay. Minecraft manages its environment by loading a specific circle of chunks around the player based on your chosen render distance. If the game attempted to process every single block in the world simultaneously, even the most powerful computers would experience severe lag.
Adjusting your render distance changes how many of these modular pieces are loaded into your system memory at one time. A lower setting unloads distant structures, which helps stabilize frame rates on lower-end devices. Managing this setting is crucial when exploring heavy areas like massive player-built cities or dense jungle biomes.
Strategic Advantages for Players
For advanced players, understanding chunk boundaries offers immense practical advantages for automated farming and base construction. Certain redstone mechanics and automated mob farms only operate efficiently when they are fully contained within a single chunk. Building across boundaries can sometimes cause machinery to break or stop working when you walk away.
Many players utilize specialized in-game tools or texture packs to view these boundaries directly while planning large projects. Keeping your most valuable resource loops inside actively loaded areas ensures consistent item production. This knowledge elevates your survival gameplay from simple exploration to highly efficient industrial management.
The Impact on World Generation
The chunk system is also responsible for how terrain generates seamlessly as you travel across the map. As you cross into a new territory, the game script rapidly generates the required 16 by 16 grids based on your world seed. This process ensures that biomes, caves, and structures connect fluidly without visible gaps or layout errors.
Occasionally, updating your game version can alter how new chunks generate adjacent to older, already explored territory. This structural division is why you sometimes see abrupt cliff sides or mismatched biomes at the edges of older maps. Recognizing how these blocks fit together helps you better preserve your long-term worlds across major updates.

Sons Of The Forest All Artifact Locations
Sons of the Forest tasks players with surviving a cannibal-infested island while uncovering deep secrets hidden beneath the surface. Among the most intriguing end-game objectives is the assembly of a mysterious golden artifact, which is divided into seven distinct pieces scattered across various underground networks. Finding all these segments allows permanent island residents to wield incredible cosmic powers, making it a highly rewarding pursuit for dedicated explorers.
Navigating the Initial Cave Networks
The journey begins in the northern sector of the island, where the first piece rests inside the Rebreather Cave. Navigating this flooded cavern requires cautious movement down the right path, where players will discover the segment resting near ancient bone remains. Following this initial discovery, players must travel to the southwestern corner of the island to find Cave B, which houses the next piece deep past multiple mutant encounters.
The third piece is located within Cave D, an intricate underground system that demands careful navigation through vertical drops. Explorers should bring plenty of lighting supplies and defensive gear, as these subterranean environments are heavily guarded by aggressive subterranean threats. Mapping out these initial locations ensures a strong foundation before tackling the final, more complex caverns.
Uncovering the Deep Subterranean Pieces
As you venture further into the island history, Cave F becomes the next major destination on your checklist. This cave requires players to utilize advanced traversal gear to reach the lowest chambers where the fourth artifact piece is hidden. The environmental hazards increase significantly here, making thorough preparation vital for survival.
Moving forward, the fifth piece is safely tucked away inside Cave G, which features winding pathways that can easily disorient unprepared spelunkers. Players should closely watch the cavern walls for unique mineral deposits that often indicate you are heading in the correct direction. Collecting these pieces brings you one step closer to unlocking the true potential of the device.
Retrieving the Final Artifact Segments
The sixth piece requires a return trip to an alternate section of Cave D, showcasing just how vast these underground structures truly are. Navigating this hidden wing reveals an entirely separate ecosystem populated by some of the most dangerous mutants on the island. Overcoming this hurdle rewards you with the penultimate fragment needed for completion.
The seventh and final artifact piece is tied directly to the culmination of the main story progression. It can only be accessed after players make their definitive choice regarding the ending and choose to remain on the island. Once retrieved, this final golden segment completes the ancient puzzle and activates the device core.
Mastering the Power of the Golden Orb
Assembling all seven pieces transforms the fragments into a powerful golden device capable of shifting the balance of power on the island. By toggling modes, players can use a blue beam to gild their base structures in Solafite, vastly increasing their defensive durability against enemy raids. This function ensures your shelters remain completely secure during late-game survival scenarios.
Additionally, the fully operational artifact grants the ability to establish functioning teleportation networks across the map. By consuming Solafite ore, you can instantly travel between activated pads to bypass hours of dangerous overland travel. Mastering these unique mechanics effectively turns you into the true ruler of the treacherous island wilderness.

Most Powerful Superhero In Marvel And DC Compared
The debate over which comic book publisher boasts the most formidable protectors has captivated fans for generations. While both universes feature legendary champions capable of shattering planets, analyzing their true upper limits requires looking past physical strength alone. By evaluating the structural mechanics of their grandest cosmic hierarchies, we can see how the top tier of heroic power operates on entirely different scales of reality.
The Pinnacle of Marvel Cosmic Might
Within the Marvel universe, standard concepts of power are anchored by foundational cosmic entities that govern reality itself. Characters like the Living Tribunal maintain universal equilibrium, ensuring that rogue forces do not fracture the delicate timeline. However, when examining true omnipotence, even these abstract manifestations bow to a singular, ultimate source known as the One-Above-All.
This supreme architect represents the absolute apex of creative force, existing far beyond the limitations of the standard multiverse. Rather than intervening in daily heroic struggles, this entity serves as the philosophical author of all life and matter. Understanding this balance helps fans see how individual characters scale against an unyielding, infinite hierarchy.
The Boundless Architecture of DC Legends
In contrast, the DC universe constructs its mythos around localized figures who possess raw, fundamental archetypal force. Superheroes in this realm often operate as living legends, with figures like Superman and the Spectre embodying ideals that transcend their physical feats. At the absolute top of this cosmic framework sits the Presence, an omnipresent creator who holds all existence in a perpetual state of imagination.
This structural approach gives DC champions a unique narrative weight, as their conflicts frequently reshape the boundaries of the greater omniverse. The Hands and other cosmic agents merely serve as extensions of this ultimate will, guiding the fate of mortal realms. This deeply layered divinity ensures that even the most grounded heroes are connected to a vast spiritual lineage.
Comparing the Supreme Overlords
When stacking these two massive pantheons against each other, the differences lie primarily in how their ultimate limits are defined. Marvel often relies on complex structural systems, where artifacts like the Infinity Gauntlet or the Heart of the Universe can temporarily rewrite cosmic laws. For those interested in exploring these intricate narrative structures further, utilizing a personal Steam account provides an excellent digital gateway to modern tactical adaptations and interactive gaming communities.
Conversely, DC places its highest tier of power within absolute metaphysical concepts that cannot be bypassed by mechanical means. The Overvoid and the Source represent boundaries of reality that even the most ambitious villains fail to truly control or conquer. This distinction makes a direct matchup complex, as one universe prioritizes systemic rules while the other emphasizes total mythic transcendence.
The Verdict on Ultimate Power
Ultimately, determining which universe holds the superior champion depends entirely on whether you value structural scaling or absolute conceptual authority. Marvel provides a highly logical hierarchy where entities fit together like gears in a massive cosmic machine. Meanwhile, DC offers an expansive, imaginative sandbox where the ultimate power is completely unyielding and beyond human comprehension.
Both approaches succeed in creating a profound sense of awe, giving their respective storylines an enduring, generational appeal. Whether analyzing a planet-shattering alien or a silent supreme creator, the true power of these characters lies in their ability to inspire endless imagination. This balance ensures that the friendly rivalry between these iconic publishers will continue to thrive for years to come.

ARK Survival Evolved vs ARK Survival Ascended Major...
The transition from a beloved original game to its modern remaster often brings significant shifts in both presentation and core mechanics. When Studio Wildcard introduced ARK Survival Ascended, it was not merely a cosmetic patch but a foundational rebuilding of the dinosaur survival experience. Understanding these updates helps players decide whether to migrate to the newer version or remain with the classic iteration.
Engine Evolution and Visual Fidelity
The most immediate shift occurs under the hood, moving the franchise from the aging Unreal Engine 4 architecture to the cutting-edge Unreal Engine 5. This technical migration introduces Nanite virtualized geometry and Lumen dynamic lighting systems to the prehistoric landscapes. Environments respond realistically to time of day changes, creating dense jungles and highly realistic water reflections that completely outclass the original version.
Beyond pure aesthetics, the engine upgrade fundamentally alters how players interact with the environment. Foliage dynamically reacts to player movement and large creatures, making tracking both wild beasts and enemy survivors far more intuitive. The enhanced rendering distance allows for strategic planning from high vantage points, eliminating the jarring pop-in effects that plagued the older release.
Quality of Life and Building Overhauls
Surviving the harsh island requires extensive crafting, and the remastered title introduces sweeping updates to construction systems. The building mechanics have been completely modernized, removing the frustrating snap-point limitations that made base design a tedious chore in Evolved. Players can now seamlessly track structural health and enjoy a much more intuitive user interface during large-scale projects.
Inventory management has also received a massive overhaul, reducing the clutter that previously distracted from active gameplay loops. The developers introduced cross-platform modding support directly into the console versions, expanding custom content accessibility beyond the traditional PC player base. These combined adjustments streamline the daily survival loop, allowing players to focus more on exploration and taming.
Creature AI and Combat Adjustments
Encountering the ancient wildlife feels distinctly different due to major rewrites in pathfinding algorithms and behavioral logic. In the classic version, massive dinosaurs frequently became stuck on minor terrain features or followed predictable patterns during combat. The updated AI allows creatures to navigate complex environments smoothly, turning standard hunting excursions into genuinely unpredictable challenges.
Combat balancing has also shifted, requiring more tactical placement and resource awareness during high-stakes encounters. The hit registration feels noticeably tighter, which rewards precise weapon usage and careful positioning during fights. These behavioral shifts ensure that even veteran survivors must relearn the habits of their favorite prehistoric threats.
Server Performance and Network Changes
Multiplayer stability remains the ultimate backbone of any persistent survival experience, and the infrastructure has evolved substantially. The newer version utilizes optimized server code designed to handle complex physics calculations without the frequent desynchronization issues of the past. This structural update minimizes the rollback events that occasionally ruined competitive encounters on older hardware.
While the newer release demands significantly higher system specifications, the resulting stability provides a much fairer competitive playground. The implementation of enhanced anti-cheat measures further protects community progress from malicious exploits. Ultimately, the upgrade delivers a more reliable environment for tribes looking to invest thousands of hours into their digital homes.

GTA V Save File Location on PC and...
Navigating the sprawling streets of Los Santos requires dozens of hours of dedication, making your campaign milestones incredibly valuable. Whether you are upgrading your operating system or shifting to a brand new desktop computer, knowing exactly where your local campaign files reside ensures you never lose a single mission milestone. This comprehensive overview provides clear technical blueprints to help you locate, back up, and safeguard your Grand Theft Auto V story data without unnecessary frustration.
Locating the Standard Rockstar Games Directory
Regardless of whether you launched the game through a specific third-party client, Grand Theft Auto V primarily utilizes a centralized directory within your default user folder structure. For the vast majority of digital configurations on modern software setups, the primary save data is located within your standard system Documents folder. You can easily access this by opening your File Explorer interface and navigating directly to the local Rockstar Games subfolder.
Inside this specific directory, you will find a designated folder named exactly after the game title which houses your personalized profile settings and sequence files. The actual files are stored within a randomized alphanumeric profile folder that represents your unique digital identifier. Keeping this directory clean and knowing its location helps you manually copy files whenever you need to secure your historical records.
Understanding Steam and Epic Games Custom Storage
While the primary directory remains relatively consistent across different ecosystems, retail clients sometimes alter how network synchronization interacts with your desktop files. Players using different computer systems can easily find their targeted directories by entering their specific user profile pathways in the Windows search bar. Manually checking these subfolders ensures that your latest progress matches what is currently stored in the developer cloud network.
Occasionally, cloud synchronization errors or launcher updates might create temporary data disparities that confuse the local operating system. Knowing how to locate these folders manually gives you total control over your digital properties without relying entirely on automated background software. If you ever plan to modify your system variables, creating a duplicate copy of this entire directory is highly recommended.
Safeguarding Your Campaign Records for System Changes
Preserving your criminal empire across Los Santos requires a proactive approach to hardware maintenance and data management. Many enthusiasts prefer to copy their profile folders directly to external solid-state storage drives prior to initiating major system upgrades. This simple precautionary action effectively eliminates the risks associated with unexpected file corruption or sudden storage device failures.
If you encounter synchronization warnings when opening the Rockstar Games Launcher, matching the timestamps on your local documents folder will help you choose the correct timeline. Restoring a previous session is as straightforward as moving your backed-up folder directly back into the official system directory. Taking charge of these files guarantees that your custom progress remains entirely intact for future play sessions.

How To Get To Ranger Station Foxtrot
Navigating the vast and unforgiving landscape of the Mojave Wasteland in Fallout: New Vegas requires a solid understanding of military geography. Among the various strategic outposts established by the New California Republic, Ranger Station Foxtrot remains one of the most isolated and poorly supplied locations. Reaching this northern outpost can be tricky due to the treacherous terrain and hostile wildlife that surround the area.
Locating the Outpost on the Map
Ranger Station Foxtrot is situated in the northwestern portion of the map, nestled at the foot of a prominent radio mast. It is located directly north of Red Rock Canyon, tucked away inside a desolate dead-end ravine. Because of its obscure position behind the mountains, players often struggle to find a direct path from the major highways.
The outpost serves primarily as a communications hub, meaning its visual profile is dominated by antennae rather than heavy fortifications. It is heavily recommended to look for the tall radio transmission tower cutting into the sky as you approach the perimeter. Keeping your eyes on the horizon will prevent you from getting lost in the winding canyon paths.
The Safest Routes from Nearby Landmarks
The most straightforward method to reach the station safely is to start your trek from the Great Khan stronghold in Red Rock Canyon. From the main canyon floor, you will need to head northward and carefully navigate through the rocky mountain passes. Be prepared to face steep elevation changes that can slow your movement and make you vulnerable to ambushes.
Alternatively, players can approach the area by traveling northwest from the Bitter Springs region or Jacobstown. Navigating the rugged wilderness requires constant vigilance, especially when climbing the steep cliffsides. For gamers seeking alternative historical adventures, taking a look at can provide a refreshing change of pace before returning to the wasteland.
Overcoming Environmental Hazards and Wildlife
The path leading up to the communications tower is notoriously dangerous due to the native predators roaming the surrounding valleys. Cazadores and mutated insects frequently establish nesting grounds along the narrow mountain ridges, making high-impact weaponry essential. Ensuring your inventory is stocked with plenty of Antivenom before departing will save you from a quick demise.
Aside from the wildlife, navigating the dead-end canyon means you can easily be cornered by roaming Viper raiders. Maintaining a stealthy approach or utilizing long-range scouting rifles will allow you to clear the path before entering tight spaces. Once you bypass these tactical hurdles, the friendly NCR personnel at the station will offer a safe zone to rest and recuperate.

Disney Dreamlight Valley Cannoli Recipe Explained
Cooking within the magical confines of Disney Dreamlight Valley is a core gameplay mechanic that allows players to discover unique culinary creations. Preparing diverse meals helps you restore vital energy, complete specialized character quests, and build strong friendships with iconic villagers throughout the valley. Among the various sweet treats available, the traditional cannoli stands out as an elegant dessert option for players looking to expand their collection of multi-star recipes.
Understanding the Cannoli Recipe Structure
The cannoli is classified as a four-star dessert recipe within the extensive cooking catalog of the game. This means you will need to gather exactly four specific ingredients to successfully assemble this iconic pastry at any cooking station. Mastering this specific combination ensures you can easily prepare the dish whenever a villager requests it at Remy's restaurant.
While some dessert options allow for flexible ingredient substitutions, this pastry requires precise components to achieve the correct result. Understanding where to locate each required item across the various biomes will save you valuable time during your daily farming adventures. Gathering your materials beforehand makes the entire preparation process fluid and efficient.
Required Ingredients for the Pastry
To successfully prepare a fresh plate of cannoli, you must first gather one portion of wheat, one carton of eggs, one block of cheese, and one stick of vanilla. Wheat serves as the base structure for the pastry shell and can be easily purchased as seeds or fully grown crops from Goofy's stall in the Peaceful Meadow. Eggs and cheese must be purchased directly from the pantry shelves inside Chez Remy after unlocking the famous chef.
The final crucial component is vanilla, which grows naturally as a wild forageable plant sticking out of the ground. Players can discover vanilla scattered across the ground specifically within the Sunlit Plateau biome. Gathering all four ingredients allows you to safely approach any cooking pot to begin the baking process.
How to Cook and Use the Dessert
Once you have all the necessary elements in your inventory, interact with a cooking station and place one wheat, one egg, one cheese, and one vanilla into the pot. You will also need one piece of coal ore to fuel the fire and initiate the culinary process. After a brief animation, the game will permanently save the recipe to your collection for quick automatic selection in the future.
Serving this delicious four-star dessert provides a substantial energy boost when consumed by your avatar during intense resource gathering sessions. It can also be sold at any of Goofy's stalls around the map if you are looking to earn extra Star Coins quickly. Additionally, giving the pastry as a daily favorite gift to characters like Mirabel or Olaf will significantly accelerate your friendship progression mechanics.

Persona 5 Matador With Magaru Fusion Guide
Fusing specific Personas with designated abilities is one of the most important mechanics for progressing the Strength Confidant in Persona 5. Ranking up the Twin Wardens, Caroline and Justine, requires fulfilling unique fusion requests throughout your journey in the Velvet Room. One early challenge involves creating a Matador that possesses the multi-target Wind skill Magaru, which tests your understanding of inheritance mechanics.
Understanding the Strength Confidant Requirement
The Twin Wardens ask players to present a Matador with Magaru to unlock Rank 3 of the Strength Confidant. Completing these Velvet Room tasks grants essential bonuses, including advanced fusion capabilities and price discounts. Fulfilling this request early helps maintain a steady pace for social link progression.
Unlike standard fusions where skills are learned automatically upon leveling, this task demands intentional skill transfer during the fusion process. Players must select base Personas that can pass down Magaru directly to Matador. Planning your ingredients beforehand saves significant time and in-game money.
Best Persona Combination for Matador
One reliable method to fuse Matador with Magaru involves combining Nekomata with Mokoi. Nekomata belongs to the Hermit arcana and naturally learns Magaru at level 17, or can inherit it from earlier Personas. Combining Nekomata with the Death arcana Mokoi results in the Death arcana Matador carrying the required skill.
Another common recipe utilizes Regent, a Treasure Demon encountered in early Palaces and Mementos. Fusing Regent with a Persona like Mokoi or Obariyon can easily yield Matador while allowing skill inheritance. Utilizing Treasure Demons simplifies the process by reducing the need for intermediate leveling.
Inheriting and Confirming the Skill
Before confirming the fusion in the Velvet Room, carefully inspect the skill selection screen. You must manually check Magaru so that Matador retains it after the fusion completes. Forgetting to select the skill will require repeating the process or using a Skill Card.
If your ingredient Personas lack Magaru, you can also use a Magaru Skill Card directly on Matador. Skill Cards offer a quick alternative if you already have one in your item inventory. Once Matador enters your active lineup with Magaru equipped, speak to Justine to trigger the Rank 3 event.
Maximizing Velvet Room Benefits
Ranking up the Twin Wardens provides substantial gameplay advantages throughout your playthrough. Unlocking higher rank perks allows you to fuse Personas above your current level for a fee, drastically enhancing combat readiness. Keeping up with fusion requests ensures you stay prepared for challenging boss encounters.
Managing your Persona registered list in the Compendium allows you to summon key fusion ingredients whenever needed. Re-registering Personas after they learn crucial skills makes future request chains much easier to complete. Efficient Velvet Room management remains a cornerstone of success in Persona 5.

Lies of P Belle Quest Walkthrough and Choices
Uncovering the deeply personal stories scattered throughout Krat provides players with rare rewards and vital world-building details in Lies of P. Among these optional narratives, the questline belonging to Belle, an outsider soldier investigating the tragic Puppet Frenzy, stands out as a highly missable encounter. Successfully completing her mission requires careful exploration during Chapter 7 and navigating a crucial moral choice that directly affects your Humanity score.
Finding Belle in the Grand Exhibition
Players can first encounter Belle while exploring the upper levels of the Grand Exhibition Gallery. To locate her, you must navigate across the high metal scaffolding and catwalks near the top of the pavilion. Look closely for a secluded ladder that drops down into an isolated platform where she is currently hiding from the rampaging automatons.
Speaking with Belle reveals her background as an external investigator who has become completely trapped by the violence engulfing the city. You must clear the local area and defeat the main boss of the exhibition, Champion Victor, to safely progress her story. Once the boss lies defeated, return to Hotel Krat to find that she has successfully relocated to the main lobby area near the central staircase.
Investigating the Station for Atkinson
After reaching Chapter 9 and returning to the devastated Krat Central Station, you should speak with Belle again at the hotel to officially begin her personal favor. She explains that her trusted partner, a fellow soldier named Atkinson, was separated from her during the chaos and remains missing. She tasks Pinocchio with searching the train platform area to discover his ultimate fate.
As you explore the corrupted corridors of Krat Central Station, you will eventually find a hidden alcove near the primary tracks where a mutated figure resides. This creature turns out to be Atkinson himself, who has tragically succumbed to the Petrification Disease but still retains a shred of sanity. Before he loses his mind entirely, he hands you a personal letter meant for Belle and begs you to hide the monstrous truth from her.
Navigating the Ultimate Choice and Rewards
Returning to Hotel Krat triggers the final phase of the questline where you must choose how to report your findings to Belle. She will ask you directly whether her partner survived the incident or if he turned into a monster. This moment serves as an important narrative fork that alters your rewards and overall progression toward specific game endings.
If you choose to lie and tell her that Atkinson died bravely fighting as a human soldier, you will receive a massive boost to your total Humanity points. Furthermore, Belle will reward you with a special collectible record titled Why, which can be played back at the gramophone to further elevate your human characteristics. Choosing to tell the harsh truth will cause her to despair, locking you out of these valuable narrative benefits.

How To Put Your PS5 Sideways Safely
Deciding how to display your PlayStation 5 console involves balancing entertainment center space with proper mechanical care. While the hardware features a striking curved aesthetic that naturally draws the eye vertically, configuring the machine horizontally is a highly stable and practical alternative. Utilizing the correct orientation protects internal cooling structures and prevents accidental falls during intense gaming sessions.
Evaluating Space and Stability Benefits
Placing your gaming hardware in a flat position significantly lowers the center of gravity, making it nearly impossible to tip over accidentally. This orientation provides excellent peace of mind for households with active pets or small children roaming near the media console. Furthermore, many enclosed TV stands and entertainment centers are specifically designed to accommodate wide, short electronic devices rather than tall towers.
Aligning the hardware flat also reduces potential stress on the internal optical drive mechanism during disc reading cycles. Some hardware enthusiasts suggest that horizontal placement maximizes the long-term reliability of liquid metal cooling components over several years of use. Ultimately, transitioning to a flat setup offers a reliable foundation that easily fits into standard living room furniture layouts.
Preparing the Console and the Base Stand
Before moving your entertainment setup, completely power down the system and disconnect all attached cabling from the rear ports. You will need to utilize the official plastic base attachment that came packaged inside the retail box to ensure stable alignment. This versatile plastic disc features a rotating inner mechanism that must be correctly adjusted depending on your desired orientation.
For a flat installation, rotate the moving part of the attachment until the integrated storage compartment for the vertical screw is completely hidden. If you are configuring a newer slim model or a pro variation, you will want to locate the specialized plastic clip transparent legs included with the package. Ensuring you have the proper model-specific support pieces ready prevents unnecessary scratches on the outer white shell plates.
Attaching the Horizontal Alignment Clips
To secure the original launch edition hardware sideways, turn the machine over so the rear connectivity ports are facing upward toward you. Align the plastic base hooks with the specific embossed PlayStation symbols printed near the rear edge of the dark plastic chassis. Press the clips firmly onto the edge until they snap securely into place, creating a balanced raised platform.
For owners of the redesigned smaller editions, the process involves inserting small clear pegs directly into the slots along the center seam line. If you need assistance with checking your overall console health or system settings during this physical transition, you can easily to keep your device updated. Once these support pieces are securely locked in, gently lower the machine onto your shelf, ensuring that the disc slot sits on the bottom left side.
Maximizing Airflow and Cooling Efficiency
Maintaining clear space around the ventilation zones is crucial for avoiding hardware overheating issues during extended play sessions. Ensure the horizontal surface has at least several inches of open breathing space behind the exhaust ports to expel hot air cleanly. Avoid placing the device directly on thick carpets or cloth surfaces that can trap ambient heat and block the intake vents.
Regularly dusting the surrounding shelf area keeps the internal cooling fins clean and minimizes overall fan noise over time. Storing the console inside a fully closed cabinet is highly discouraged unless the back panel of the furniture is entirely removed for circulation. Following these careful placement guidelines ensures your entertainment system remains cool, quiet, and completely secure for years to come.

Why Is Aragorn Black In MTG And What...
The release of the Magic: The Gathering crossover set, The Lord of the Rings: Tales of Middle-earth, sparked intense discussions across the gaming community. One of the most talked-about creative decisions was the depiction of Aragorn as a Black man on several prominent cards. Understanding the vision behind this choice provides valuable context into modern fantasy adaptations and how classic literature can be reimagined for a global audience.
A Modern Reimagining of Middle-earth
Wizards of the Coast approached the legendary fantasy universe with a desire to reflect the diverse community of contemporary card players. The designers intended to create a fresh visual interpretation that honors the core themes of the source material rather than replicating previous film adaptations. By depicting Aragorn with dark skin, the creators invited new generations of fans to see themselves reflected in one of literature's greatest heroes.
This visual direction aligns with contemporary fantasy trends where established worlds are updated to encompass a broader spectrum of human experiences. The developers emphasized that the core character traits, narrative arc, and nobility of the character remain entirely unchanged. This creative freedom demonstrates that the heroic virtues defined by Tolkien can transcend specific physical descriptions.
Mechanical Representation and In-Game Value
Beyond the cultural conversation, the specific multi-colored cards representing Aragorn carry significant mechanical weight within the gameplay ecosystem. Cards like Aragorn, the Uniter reward players for casting spells across multiple color identities, capturing his narrative role as a grand consensus builder. The rules design mirrors his journey from a lonely stray ranger to the unified High King of Gondor and Arnor.
Players looking to optimize their decks often analyze these unique multi-color abilities to build powerful strategies. The strategic synergy built into the card design ensures that the character feels as impactful on the table as he does in the novels. Fulfilling these game conditions rewards players with powerful field advantages during complex matches.
The Core Identity of the Future King
Ultimately, the card represents the fundamental values of leadership, humility, and resilience that define Aragorn throughout his long quest. His visual depiction serves as a reminder that true heroism is defined by actions, loyalty, and personal character rather than ancestral appearance. The card successfully captures his enduring spirit while expanding the boundaries of visual storytelling in the trading card hobby.

How Much Storage Does The PS5 Have
Managing your gaming library effectively on modern consoles requires a clear understanding of your hardware specifications. As video game file sizes continue to expand with high-definition textures and complex worlds, knowing your console limits becomes essential. The PlayStation 5 offers an advanced solid-state architecture designed to minimize loading screens, but its out-of-the-box capacity might surprise many new users.
Understanding the Base Internal Storage
The standard PlayStation 5 console launched with a custom built-in solid-state drive rated at 825 gigabytes of space. However, players do not get access to this entire capacity for downloading their favorite titles. A significant portion of this drive is permanently reserved for the system software, mandatory operational files, and necessary hidden cached data.
After subtracting the required operating system overhead, users are left with roughly 667 gigabytes of actual usable space. This remaining room is where all your digital software downloads, game save data, and media captures reside. For heavy enthusiasts, this initial budget can fill up rapidly after installing just a handful of massive modern releases.
The Upgraded Storage of Slim and Pro Models
Sony addressed these capacity limitations in later hardware revisions by updating the internal drive specifications. The newer PlayStation 5 Slim variants ship with a full 1 terabyte internal solid-state drive as standard equipment. This upgrade gives active gamers a welcome boost in their starting storage room right out of the box.
For the absolute highest tier of performance, the premium PlayStation 5 Pro console features a massive 2 terabyte drive. This specialized iteration ensures that dedicated players can maintain an extensive library of concurrent titles without constant deletion cycles. The actual space left for user files is notably higher on both of these updated hardware models.
Expanding Internal Space with M.2 Drives
If the built-in limits prove insufficient for your gaming habits, Sony provides an integrated hardware slot for manual expansion. The console architecture features a dedicated internal bay that accepts standard PCIe Gen4 NVMe solid-state drives. This design allows you to add up to 8 terabytes of exceptionally fast storage without sacrificing performance.
When purchasing an additional internal drive, it is crucial to select a model that features a compatible heatsink structure. The drive must meet Sony's specific read speed requirements to ensure seamless gameplay transitions. Once installed, you can seamlessly migrate current generation titles directly to this secondary internal drive.
Utilizing External USB Game Drives
Another viable option for managing your data footprint involves utilizing standard external hard drives or portable solid-state drives. These external options connect directly via the high-speed USB ports located on the back of the console casing. They offer a highly affordable method for archiving larger data collections without breaking the bank.
It is important to note that you cannot play native PlayStation 5 titles directly from a standard external USB drive due to data bandwidth constraints. Instead, this external space serves as an efficient backup zone where you can park inactive files to save time later. When you want to play those archived titles again, you simply copy them back over to your high-speed internal system drive.

Assassin's Creed Odyssey Sphinx Riddle Answers Complete Puzzle...
Confronting mythological beasts stands out as one of the most memorable components of the expansive ancient Greek journey in Assassin's Creed Odyssey. Unlike the heavy combat encounters required to defeat the Minotaur or the Cyclops, outsmarting the legendary Sphinx requires sharp mental acuity rather than raw physical strength. Players must correctly answer a sequence of randomized riddles and match their selections to corresponding symbols on nearby stone pillars to survive this trial.
Unlocking the Awaken the Myth Side Quest
Before you can test your wits against the mythical creature, your character must progress far enough into the main campaign to reach the late-game narrative arcs. You will need to initiate the questline in Boeotia, specifically by exploring the ancient ruins located near Lake Copais. Completing the introductory objectives leads directly to the primary ruins where the enigmatic creature awaits your arrival during the night cycle.
Upon arriving at the designated excavation site, interacting with the central relic triggers the spectacular appearance of the creature. It is highly recommended to create a manual backup save file prior to starting the conversation to avoid losing progress if an incorrect option is chosen. The trial consists of three randomly selected questions chosen from a larger pool of twelve distinct historical brainteasers.
Solving the Randomized Sphinx Riddles
The core challenge lies in listening carefully to the specific wording of each question presented during the dialogue exchange. Common questions focus on fundamental natural elements, such as the passage of time, the movement of rivers, or the shifting behavior of shadows. For example, if the question describes something that devours all things yet builds nothing, the correct solution corresponds directly to time.
Other potential questions describe things that are born small but grow rapidly, or objects that can be hidden without ever being buried. Players must maintain strict focus during these dialogue options because selecting the incorrect option ends the encounter in immediate failure. Understanding the conceptual nature of these ancient queries ensures that you can safely navigate the dialogue trees without needing to restart.
Matching the Answers to the Stone Pillars
Providing the correct spoken answers during the dialogue phase represents only the first step in successfully completing this ancient trial. After the conversation concludes, the surrounding arena will illuminate, revealing several carved stone pillars displaying unique mythological symbols. You must walk around the environment and physically activate the specific symbols that directly correspond to your verbal answers.
Interacting with an incorrect symbol triggers an instant electrical trap that will immediately eliminate your character, forcing a complete reload of the scenario. Once you successfully activate all three correct symbols, the creature will acknowledge your victory and safely dissolve into the ancient ether. Achieving this outcome rewards your character with a unique piece of legendary gear and a crucial artifact needed for the broader campaign conclusion.

Lego Jurassic World Stuck At Gate Isla Nublar...
Lego Jurassic World provides players with a delightful journey through the iconic dinosaur franchise, combining classic humor with engaging environmental puzzles. However, many adventurers hit an unexpected roadblock when trying to progress past the massive park entrance doors on Isla Nublar. This frustrating progression block can halt your story momentum, but understanding the underlying mechanics will help you get back to hunting fossils quickly.
Understanding the Isla Nublar Gate Glitch
The progression issue typically occurs during the main story campaign when players attempt to interact with the security systems near the gate. Many players find themselves unable to bypass this specific transition area because an interactive prompt or terminal fails to load properly. This softlock leaves characters running around the enclosure without any clear method to trigger the next cinematic sequence.
In most instances, the problem is caused by character interactions triggering out of order or a script failing to register a completed puzzle step. For example, using specialized tracking abilities or scanning devices too early can confuse the internal mission tracking script. Recognizing the exact moment the sequence breaks is the first step toward implementing a reliable solution.
Step by Step Walkthrough to Trigger the Gate
To successfully bypass the barrier, you must ensure that all preceding puzzle mechanics are completed in the exact order the game expects. Begin by clearing the immediate area of breakable Lego objects to ensure no stray bricks interfere with the character pathfinding. Once the area is completely clear, switch to the character equipped with the scanning device to locate the hidden network node.
After discovering the terminal, carefully complete the hacking mini-game without switching characters mid-way through the process. Keeping your focus on a single character prevents the scripting engine from dropping the active quest parameters. If the prompt still refuses to show up, try moving your team away from the entrance to force the proximity triggers to reset.
Proven Fixes for Persistent Progress Blocks
If standard gameplay adjustments do not resolve the issue, a full reload of the checkpoint is often the most effective remedy. Access the pause menu and select the option to restart from the last automatic save location to refresh the map elements. This quick reset fixes broken scripting loops and respawns missing interactive elements near the gate.
Another excellent workaround involves adjusting your display or platform configurations temporarily to bypass mechanical bugs. For players on older hardware, capping the frame rate or disabling V-sync in the options menu can resolve unusual physics engine glitches. These technical adjustments frequently clear up hidden interaction errors that prevent prompts from showing up during complex puzzle sequences.
Tips to Avoid Future Campaign Glitches
Preventing future progression issues requires a deliberate approach to exploring the remaining islands in the campaign map. Try to avoid rushing through structural transitions before the ambient character dialogue completely finishes playing out. Allowing the voice lines and audio cues to conclude naturally guarantees that the game loads subsequent triggers correctly.
Additionally, keeping multiple manual save slots allows you to revert to earlier progress if a major glitch impacts your current file. Relying solely on the automated save system can occasionally lock your progress into a permanently broken state. By managing your save files actively, you can enjoy the whimsical prehistoric adventure without worrying about losing your hard-earned collectible items.

Who Is The Strongest Person In Marvel Most...
The Marvel Universe features a massive hierarchy of cosmic entities, alien gods, and mutated superheroes who constantly redefine the limits of power. Discerning who stands at the absolute peak requires looking past traditional physical strength and diving into the realm of multiversal reality warping. By evaluating the supreme entities that govern all of existence, we can definitively rank the most dominant forces in comic history.
The Ultimate Source of Omnipotent Power
At the absolute apex of the Marvel multiverse sits a singular entity known as The One Above All. This supreme being represents the ultimate creator, holding complete omnipotence, omniscience, and omnipresence across every reality. No matter how powerful a hero or villain becomes, their abilities are ultimately just a fraction of this entity's total authority.
In many storylines, comic creators have implied that this figure is a manifestation of the writers and artists themselves. This metatextual layer ensures that the character remains untouchable, functioning as the ultimate source of all creation and destruction. Therefore, any debate regarding the strongest person in the universe always begins and ends with this supreme authority.
The Guardian of Multiversal Balance
Directly beneath the ultimate creator stands the Living Tribunal, a colossal three-faced cosmic entity tasked with maintaining universal equilibrium. This judicial power ensures that no individual reality or magical artifact disrupts the delicate balance of the multiverse. The entity acts as an impartial judge, stepping in only when threats reach a catastrophic scale.
With three distinct faces representing Equity, Vengeance, and Necessity, the Living Tribunal possesses nearly limitless power to rewrite universal laws. Even artifacts as destructive as the Infinity Gauntlet can be easily neutralized by a single decree from this cosmic arbiter. While not entirely immortal, its role makes it the most formidable active force monitoring the Marvel cosmic landscape.
Abstract Embodiments and Beyond Dimensional Threats
Beneath the judicial system of the multiverse reside the abstract entities that embody the fundamental concepts of reality itself. Beings like Eternity, Infinity, Death, and Oblivion represent the physical and metaphysical building blocks of existence. These forces do not fight in a traditional sense, but their vast reality-warping capabilities place them far above standard heroes.
Furthermore, threats originating from outside the traditional multiverse, such as the enigmatic Beyonders, have historically challenged the cosmic status quo. These extra-dimensional entities possess enough raw power to systematically destroy entire pantheons of cosmic gods. Understanding these distinct tiers helps readers appreciate how varied the upper echelons of power truly are in modern comic narratives.

Lego Star Wars The Force Awakens Codes Complete...
Exploring the expansive galaxy of Lego Star Wars The Force Awakens offers players a delightful combination of classic brick-building mechanics and cinematic space adventures. To help you maximize your enjoyment and bypass the traditional grind, utilising built-in developer shortcuts provides an excellent pathway to immediate fun. This comprehensive guide outlines everything you need to know about unlocking your favorite characters and vehicles instantly.
How to Access the Cheat Entry Menu
Navigating the options to input your secret phrases is a straightforward process that can be done at almost any point during your galactic journey. Players simply need to pause the active gameplay sessions and scroll down to the dedicated Enter Code selection in the main settings screen. Alternatively, you can visit the terminal located within the D'Qar Resistance Base to manage your unlocks directly from the physical game hub.
Once inside the entry terminal interface, a digital keyboard will appear allowing you to input specific character strings. Successfully entering a valid sequence triggers an immediate confirmation notification on your screen, indicating that the new content is ready for use. This feature allows fans to jump straight into action with iconic figures without spending hours farming the local currency.
Unlocking the Roster of Galactic Heroes
The character select screen in this blocky adaptation features dozens of familiar faces spanning the entire sequel trilogy timeline. By utilizing targeted unlock sequences, you can instantly add unique variants of major protagonists like Rey, Finn, and Poe Dameron to your Free Play character pool. These shortcuts are particularly useful for uncovering regional secrets that require specific character abilities early in the campaign.
Aside from the core heroes, several specialized codes grant access to unique historical figures and background personalities from the wider lore. For instance, entering the correct code will immediately unlock B-Wing Pilot or the mysterious Crimson Corsair to diversify your digital team. Experimenting with these diverse character options adds a refreshing layer of variety to traditional level replay sessions.
Expanding Your Vehicle Collection
Traversing the atmospheric sectors and deep space combat arenas becomes significantly more exciting when you have a fully loaded garage at your disposal. While many spacecraft naturally unlock by completing major story chapters, hidden vehicle codes allow you to pilot rare transports and microfighters ahead of schedule. These digital assets provide players with efficient transport options across the expansive hub worlds.
From agile starfighters to heavy ground vehicles, these shortcuts ensure that you never find yourself stranded during intensive free-roaming exploration phases. You can easily select your newly spawned fleet from any designated vehicle call-in point scattered across Jakku or Takodana. Enjoying the game alongside a companion using can elevate the overall experience as you pilot matching fleets together through chaotic missions.
Maximizing Game Progression and Rewards
It is important to understand how implementing these developer tools impacts your overall completion metrics and achievement tracking before diving in. Fortunately, utilizing standard character unlocks does not disable your ability to save progress or earn traditional platform trophies during gameplay. This makes the feature highly accessible for casual players looking to enjoy the sandbox environment at their own comfortable pace.
However, players should still focus on collecting traditional Red Bricks to secure long-term gameplay multipliers like stud magnets and score boosts. Combining instant character availability with active score multipliers creates an optimal setup for achieving true completionist status rapidly. Embracing these fun additions allows everyone from seasoned veterans to young children to experience the absolute best the galaxy has to offer.
Ff7 Remake Chapter 14 Side Quests Complete Side...
Final Fantasy 7 Remake gives players a massive world to explore, and Chapter 14 serves as the ultimate hub for optional content before the final narrative push. Titled In Search of Hope, this segment opens up the Midgar slums, letting Cloud and his companions assist local citizens through various odd jobs. Completing these challenges not only rewards you with powerful gear but also unlocks special narrative resolutions later on.
Navigating the Midgar Slums Hub
Before launching into specific objectives, understanding the physical layout of the world during this chapter is essential for maximizing efficiency. Players can move freely between the Sector 5 Slums, the Sector 6 Slums, and Wall Market to locate different quest givers. Utilizing the Chocobo Express transportation system allows you to travel instantly between these key districts without facing repetitive combat encounters along the way.
Gathering all available missions simultaneously saves a tremendous amount of time, as several objectives share geographic locations. For instance, exploring the collapsed expressway helps you progress multiple hunting tasks at the exact same time. Keeping a close eye on your mini-map ensures you do not miss hidden non-playable characters offering secret rewards.
Locating the Secret Stashes and Lost Kids
One of the most expansive multi-part activities in this chapter involves tracking down Corneo's secret vaults scattered across the outer sectors. To open these locked doors, you must first complete the Subterranean Menace mission to acquire the necessary key from Kyrie. Once unlocked, these vaults yield rare tactical components, valuable items, and large amounts of gil that enhance your party infrastructure.
Another major objective requires assisting the local orphanage by locating missing children who wandered into dangerous territory. You will need to travel toward the graveyard area where powerful phantom entities ambush unsuspecting travelers. Defeating these spectral foes requires specific elemental magic setups, so preparing your materia ahead of time guarantees a swift victory.
Confronting Elite Monsters and Battle Intel
The combat-focused missions in this chapter pit your party against unique variant monsters that test your understanding of defensive mechanics. The Angel of the Slums questline culminates in a brutal arena battle against a ferocious mechanical monstrosity. Exploiting lightning magic and utilizing heavy physical staggering techniques helps bring down the mechanical threat efficiently.
While roaming the outskirts, you should also check in with Chadley to review your current battle parameters and unlock new challenges. Completing these combat requirements allows you to obtain top-tier summon materia that drastically shifts the flow of late-game boss fights. Balancing your party composition ensures that Cloud, Tifa, and Barret can counter any elemental resistances encountered in the field.
Maximizing Rewards and Narrative Impact
Finishing every single assignment in this chapter provides more than just standard gear upgrades and character experience points. Completing all nine available side quests triggers a unique letter from the Guardian Angel to appear on the path toward the next objective. Snagging this item unlocks a special achievement and grants access to the elemental materia accessory for advanced setups.
Furthermore, your dedication to helping the citizens directly influences individual character resolutions at the beginning of the next major chapter. The companion you interacted with the most during these optional scenarios will share an exclusive cutscene with Cloud. Taking the time to finish these tasks provides a fulfilling gameplay experience and deepens the overall story.

Fallout 3 The Replicated Man Quest Guide
Fallout 3 delivers a captivating narrative experience through its numerous side quests, none more intriguing than the mystery surrounding a missing android. Known as The Replicated Man, this specific mission challenges players to navigate ethical dilemmas while exploring the dangerous Capital Wasteland. Players must gather clues and decide the fate of an advanced synthetic being hiding among the human population.
Initiating the Hunt in Rivet City
To begin this quest, you need to travel to the localized naval vessel community known as Rivet City. Inside the science lab, you will encounter Dr. Zimmer, an intense man representing an organization from the Commonwealth. He requests your assistance in tracking down a highly advanced mechanical prototype that has escaped his custody.
Dr. Zimmer provides the initial context but leaves the actual detective work entirely up to the Lone Wanderer. Successful completion requires exploring various settlements and talking to citizens who might hold pieces of the puzzle. Gathering information from holotapes and local rumors will eventually point you toward the true identity of the target.
Tracking the Clues Across the Wasteland
Uncovering the mystery requires interacting with various characters throughout the game world who possess unique information. Speaking with technology experts, doctors, and underground railroad operatives yields essential details regarding a facial reconstruction surgery. These scattered holotapes reveal that the android underwent extensive memory replacement to forget its past life entirely.
As you gather more evidence, you will eventually discover that the runaway android is currently serving as the head of Rivet City Security under the name Harkness. He remains completely unaware of his synthetic origins due to the permanent memory wipe procedure. This realization sets up a dramatic confrontation where you must decide how to handle the truth.
Choosing Your Path and Collecting Rewards
Once you confront Harkness with the evidence, you can choose to restore his original memories using a specific activation code. At this point, the quest branches into multiple paths based on your moral alignment and desired outcomes. You can choose to help Harkness maintain his freedom or betray him by reporting his location directly to Dr. Zimmer.
For players looking to maximize their inventory, it is possible to acquire rewards from both factions through careful dialogue choices. Agreeing to kill Zimmer for Harkness rewards you with a unique plasma rifle, while turning him in yields a special combat perk. Balancing these choices allows you to experience the full narrative depth of this memorable Commonwealth preview.

Best Dark Souls 3 Weapons Ranked
Choosing the ideal armament in Lothric requires a deep understanding of scaling, movesets, and situational utility. Dark Souls 3 offers an enormous variety of tools for combat, but certain options naturally rise above the rest due to their sheer efficiency in both player-versus-environment and competitive setups. Navigating these diverse options allows players to optimize their specific character builds for maximum success against challenging bosses.
Top Tier Dexterity and Fast Hitting Options
For players who favor agility and high sustained damage output, the Sellsword Twinblades remain the absolute gold standard across the entire campaign landscape. When paired with a Dexterity-focused build and enhanced by dynamic elemental resins, these dual swords can carve through tough enemy health bars with unmatched speed. Their rapid horizontal sweeps allow you to punish small recovery windows during intense boss encounters.
Another exceptional choice for agile combatants is the Astora Greatsword, which uniquely blends ultra-greatsword range with remarkably low weight. This weapon scales phenomenally well with a sharp infusion, granting long-range crowd control capabilities without completely draining your stamina reserves. Utilizing its unique charging skill can easily knock down smaller targets and keep aggressive mobs at bay.
Unmatched Strength and Heavy Hitting Armaments
Commanding the battlefield with massive physical presence requires weapons that can break enemy poise and deliver staggering critical strikes. The Greatsword, heavily inspired by classic dark fantasy aesthetics, offers sweeping horizontal clearing slashes that excel at controlling crowded corridors. Its massive vertical chops can flatten standard enemies, preventing them from starting their own offensive patterns entirely.
If you prefer a mix of blunt striking force and reliable defensive capabilities, the Ledo Great Hammer stands out as a devastating endgame powerhouse. This colossal hammer possesses an incredibly high poise health value, allowing you to swing directly through incoming enemy assaults during traded blows. The weapon skill coats the weapon in protective stone shards, culminating in a powerful area-of-effect blast that deals massive damage.
Versatile Quality and Balanced Choices
Quality builds that split attribute points evenly between Strength and Dexterity unlock access to some of the most versatile movesets in the entire game. The Hollowslayer Greatsword delivers a highly unique fluid animation sequence that transitions seamlessly between horizontal sweeps and forward thrusts. Additionally, this specialized blade deals extra damage against the numerous hollowed enemies encountered throughout your journey.
For those seeking standard straightforward reliability, the Claymore remains a beloved community staple that performs exceptionally well in almost any tactical situation. Its balanced scaling ensures steady damage progression, while its thrusting heavy attack provides crucial range advantage in narrow castle hallways. The weapon serves as a flexible template that adapts easily to various infusion paths depending on your immediate playstyle needs.
Advanced Magic and Hybrid Infusion Tools
Integrating spellcasting attributes into your melee combat strategy opens up highly specialized tactical variations for dedicated hybrid builds. The Moonlight Greatsword remains the definitive choice for Intelligence scholars, projecting powerful magical energy waves without consuming any focus points during fully charged heavy strikes. This distinct mechanic allows casting characters to conserve their magical reserves for distant threats.
Faith-oriented players will find incredible synergy by utilizing the Crucifix of the Mad King, which blends physical striking force with dark elemental attributes. This unusual weapon features a erratic weapon skill that triggers random auxiliary effects, ranging from sudden poise boosts to delayed explosive detonations. Balancing these unpredictable mechanics rewards strategic adaptation and completely changes how you manage close-quarters combat scenarios.

Poker Conversations That Make More Sense Today
The vocabulary used around the poker table has undergone a massive transformation over the last few decades. What once sounded like a completely foreign language filled with cryptic metaphors is now standard terminology for strategic thinkers. Understanding these shifting dialogues can significantly improve how you process modern card room strategies.
The Shift from Metaphor to Game Theory
In the past, poker discussions relied heavily on colorful slang and psychological intuition to describe player actions. Today, conversations are heavily rooted in mathematical models and game theory optimal principles that clarify exactly why a choice is made. This shift allows players to dissect complex hand histories with unprecedented precision and clarity.
Instead of merely guessing an opponent's emotional state, modern players discuss ranges, equity realization, and polarized betting frequencies. These structured discussions help clear away the ambiguity that used to plague traditional strategy guides. Consequently, even newcomers can grasp advanced concepts much faster by focusing on these logical frameworks.
How Analytical Concepts Broaden Table Clarity
When you listen to contemporary poker enthusiasts talk, you will notice a strong emphasis on data collection and statistical trends. Terms like blockers and expected value dominate the conversation, changing the way participants evaluate every single betting round. This analytical focus ensures that table talk revolves around long-term profitability rather than short-term results.
Navigating these highly technical discussions requires familiarizing yourself with modern digital environments where these concepts are applied daily. Many enthusiasts choose to explore established gaming platforms like Mansion88 to observe how these mathematical strategies play out in real time. Studying these patterns regularly helps translate abstract theory into practical table confidence.
The Evolution of Modern Table Etiquette
The way players communicate verbally and non-verbally during a live session has also evolved to match modern strategic demands. Casual banter has largely been replaced by a quiet, focused observation of timing tells and physical routines. Keeping conversations professional and analytically driven prevents opponents from picking up easy informational advantages.
Furthermore, understanding the logic behind these modern dialogues helps prevent common misunderstandings between table regulars. Knowing when to speak and what concepts to highlight creates a much more respectful and competitive atmosphere. Ultimately, mastering this contemporary dialect is essential for anyone looking to find long-term success in the game.

Building Better Strategies Every Match
Developing a winning strategy in competitive gaming requires continuous improvement and the ability to evaluate performance systematically. Players who rely solely on static approaches often find themselves falling behind as their opponents learn to read their movements. Achieving long-term victory demands a dedication to refining methods and fixing operational weaknesses after every single round.
Analyzing Past Performances
The first step toward continuous improvement involves reviewing your previous game sessions to identify systemic errors. By examining tactical decisions under pressure, you can uncover hidden patterns that lead to preventable mistakes. This objective analysis transforms a regular match into an invaluable learning experience that shapes your future playstyles.
Understanding where an initial plan fell short allows competitors to build resilient defenses against aggressive tactics. Experienced individuals spend significant time studying high-level matches to discover how professional teams manage complex crisis situations. Utilizing reliable hubs like Mansion88 can offer deeper insight into competitive trends and structured gameplay environments. Consistently tracking these metrics ensures that your general awareness keeps sharpening before entering the next tournament phase.
Adapting to Dynamic Opponents
No predefined plan survives contact with a highly fluid opponent who quickly alters their tactical formations. The most successful competitors possess the cognitive flexibility required to adjust their positioning on the fly when unexpected variables emerge. Being overly rigid with your framework creates predictable patterns that experienced players will easily exploit.
Cultivating tactical adaptability means practicing alternative game setups that can be deployed instantly during intense matchups. This mental readiness mitigates the impact of sudden shifts in the competitive landscape, keeping you one step ahead. Through balanced execution and rapid assessments, players can maintain optimal pressure without sacrificing late-game structural safety.
Optimizing Resource Allocation
Sustainable success relies heavily on your capacity to manage available assets efficiently throughout the game's changing phases. Wasting vital advantages early on on high-risk maneuvers frequently results in economic exhaustion during critical endgame encounters. Every action must serve a broader operational goal that reinforces your overall presence on the digital battlefield.
Learning to prioritize defensive stability while expanding your footprint ensures a steady progression toward victory. Competitors must calculate the precise risk versus reward value of every expansion move they make. Perfecting this logistical balance prevents unexpected resource depletion and establishes a highly reliable path toward dominance.
Building Mental Resilience
Elevating your strategic depth is not merely about mechanical execution but also about maintaining emotional control under immense pressure. Hasty choices made during stressful match turning points often clear an easy path for devastating enemy counters. Developing patience helps you recognize the exact moment to strike when an opponent inevitably commits a tactical blunder.
Embracing a progressive growth mindset helps transform frustrating defeats into constructive lessons for subsequent competitive engagements. Every single match serves as a foundational building block that strengthens your tactical maturity over extended periods. With persistence, disciplined study, and continuous tactical adjustments, any dedicated player can achieve elite operational performance.